Snowman
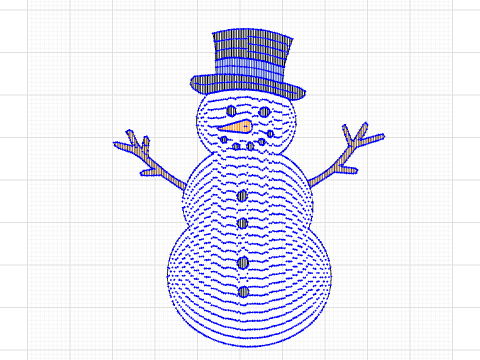
by Elaine
Import an SVG as background and trace the image.
This program allows for each stitch to be modified with an arc to create a smoother curved image. Areas of the traced image can then be filled with color, similar to the fill in Ink/Stitch.
To start: Move the cursor to the desired location on the stage area. Press 0 to clear the screen. Press the space key to set the starting point (the first point after 0 is automatically a jump stitch; press j any time you want to jump to a new location). The start point is marked with a small turtle and the word Start until you press z to close the shape. Click the Start label (or choose Show or hide the Start label in the 1 menu) to turn it off or on. Move the cursor to the next desired location and use the space key to create a stitch. Continue using the space key to create stitches. Each stitch can be modified by using the left or right arrow key. This will change the direction of the stitch. The j key creates jump stitches. Two are needed - one in the location where the jump stitch starts and the other where the jump stitch ends.
To add color: Trace the outline of each area you want to fill. Press k to choose a fill color. Move the cursor inside the area and press f to fill it. Move the cursor to the next area, choose another color if you like, and press f again.
Key stroke:
0: Clear the screen and start over (this also clears the fills, sets Fill Spacing, and resets the Stitches list)
1: Open a menu of the functions that do not need the mouse position (fill color, stitch type and size, underlay, undo, close shape, curve, show or hide, rebuild, clear). The keys still work too
Space: Move turtle to cursor
Right Arrow: creates an arc right in the stitch
Left Arrow: creates an arc left in the stitch
j: Jump Stitch
x: Jump stitch without redrawing the screen
c: Change the stitch type, then the stitch size (pick each from a menu; size 10 is the default and affects stitches traced after the change. The size also sets how far apart the stitches are along a traced line)
r: Undo the last stitch
z: Close the shape by adding a stitch back to where the last jump stitch started
k: Choose the fill color (1-10, from the Palette list)
f: Fill the area under the cursor with the fill color (only the new fill is drawn; the rest of the design is left alone)
u: Undo the last fill (redraws the design with the remaining fills)
p: Show or hide the fills
e: Rebuild the whole design in sewing order (main design, fills, then details) and redraw all the fills. Press this before File > Export as Tajima/DST or Melco/EXP, and after changing a fill setting
b: Turn the fill underlay on or off (a sparse layer sewn first, at right angles to the fill)
m: Show or hide the main design (hide it while you trace details on top of it)
d: Lock in everything traced so far as the main design and start a new details layer
Fills: The area to be filled must be enclosed by your traced lines. Small gaps between lines are bridged automatically. While tracing, press p to hide the fills so the keys stay fast. Press p again to show them. A shape traced inside another shape (an eye, a button) is left as a hole in the fill around it, and it can be filled with its own color.
Adding a fill: Each press of f draws only the new fill, so adding fills stays fast. (The first f after tracing, or after hiding the fills, redraws everything once.) Pressing u, b, or e redraws all the fills.
Sewing order: main design, then the fills, then the details layer. Everything you trace goes into the details layer, so the fills are sewn first and the outline is sewn over them. If you press d, the lines traced so far become the main design and are sewn before the fills. A fill added with f is drawn after the details layer, so press e to put everything back in sewing order before you export the embroidery file.
Layers: Press d when the first part of the design is finished. Then press m to hide the main design while you trace the details (eyes, a bow tie). Each key press redraws only the details, so it stays fast. Press m again to see everything, then p to show the fills.
Fill settings (variables you can change; after changing one, press e to redraw the fills):
Fill Spacing: the distance between fill rows (smaller is denser). It is set by the first block under the "when 0 key pressed" hat (change the 2 there to the spacing you want), so pressing 0 to start a new design resets it to that value
Fill Direction: the angle of the fill rows
Fill Gap: the largest gap in the outline that will still be treated as closed
Palette: the list of fill colors (edit it to change the colors)
Underlay Spacing: the distance between underlay rows (a larger number gives a sparser underlay)
Resizing: Trace the design with the scale set to 1. Once the design is created, it can be resized by changing the scale value in the code (the set scale block at the top of the redraw script) and running it. The fills resize with the design, as long as the fills are showing.
Creative Commons Attribution-NonCommercial-ShareAlike (CC BY-NC-SA) license .

Comments (0)
No comments yet